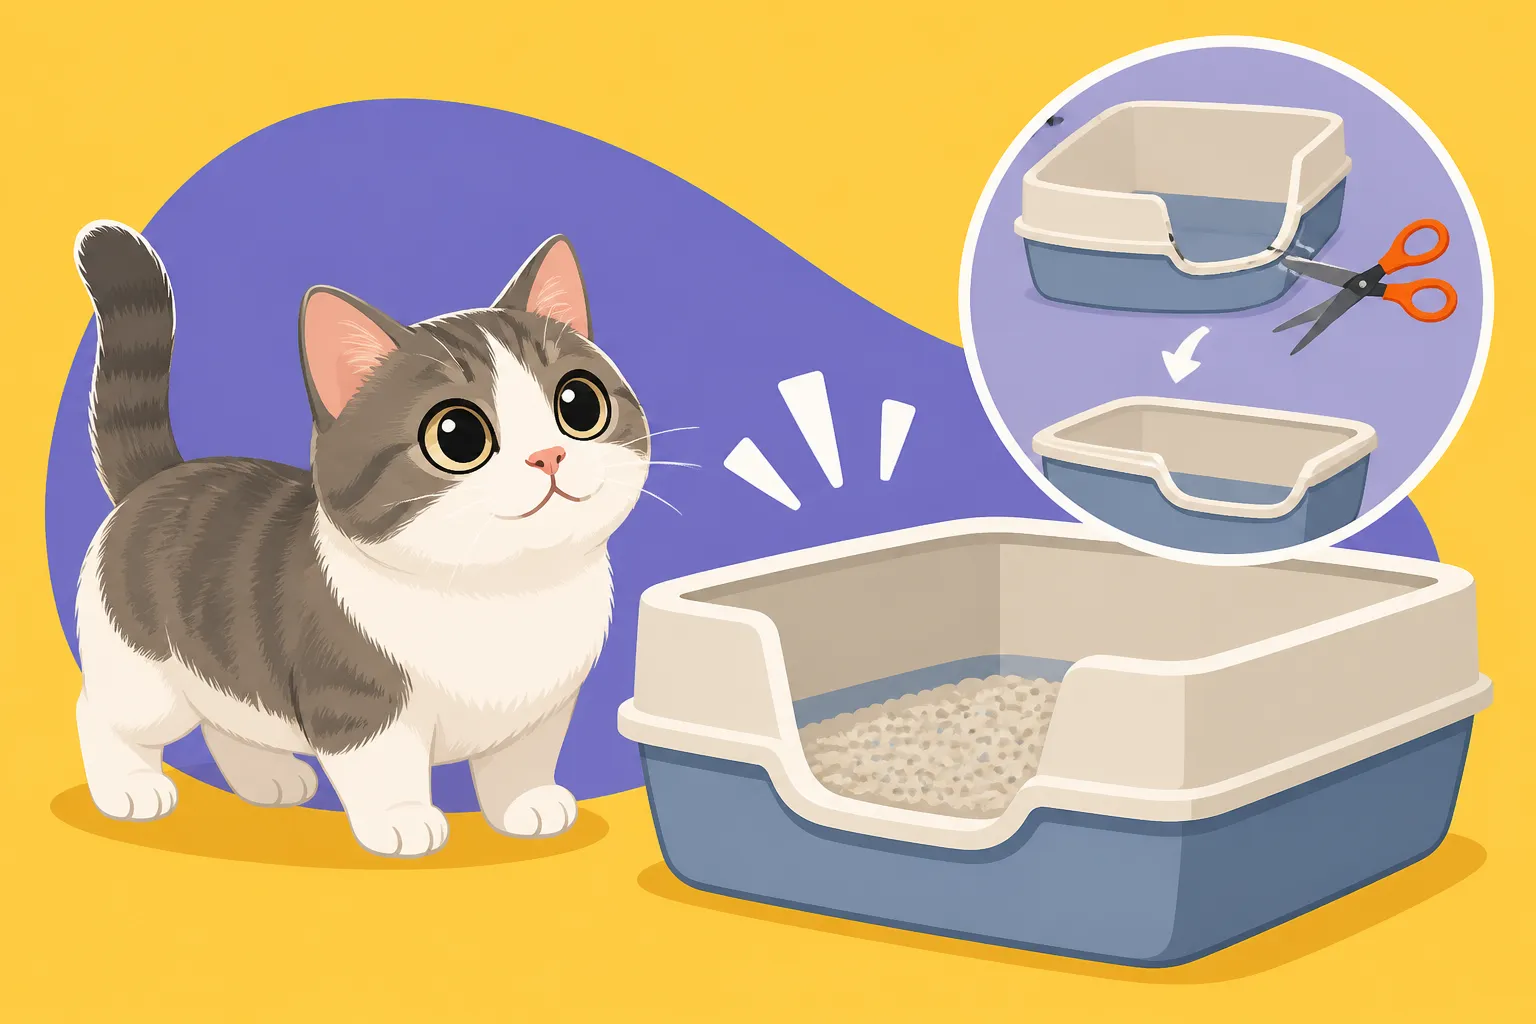
How to Cut Down a Litter Box for a Munchkin
If you've ever watched your adorable Munchkin cat struggle to hoist themselves over the high lip of a standard litter box, you know the frustration. It's heartbreaking to see them strain, sometimes even hesitate, because a basic necessity feels like Mount Everest. Many standard litter boxes are just not designed with their unique physique in mind, leading to potential accidents outside the box or even discomfort. But don't despair! Modifying an existing litter box to suit your short-legged friend is a completely achievable DIY project that can make a huge difference in their daily comfort and confidence. This guide will walk you through exactly how to do it, turning that mountain into a molehill for your furry companion.
Why a Standard Litter Box Just Doesn't Work for Your Munchkin
It's easy to assume all cats are created equal when it comes to necessities like a litter box. After all, they're cats, right? But the truth is, a Munchkin's short legs, while incredibly endearing, present some very real physical limitations that many standard litter box designs simply don't accommodate. If you've been wondering Which Litter Box a Munchkin Can Actually Enter, you're not alone. The answer is often "not the standard one."
The Physical Challenges of High Sides
Imagine trying to step over a wall that comes up to your waist every single time you need to use the restroom. That's a bit like what a Munchkin experiences with a typical litter box. Their short stature means that the rim of a conventional box can be a significant obstacle. For a cat whose legs are naturally shorter, even a small ledge can require an awkward stretch, a bunny-hop, or an undignified scramble to get in and out. This isn't just a minor inconvenience; it can put undue strain on their spine and joints, especially as they get older or if they carry a little extra weight. Over time, repeated stress on these areas can contribute to discomfort or even exacerbate existing conditions.
Sometimes, the effort required to simply enter or exit the box can deter them from using it at all. We want our cats to feel secure and comfortable in their elimination habits, and a physically challenging entrance does the opposite.
The Emotional Toll of Difficulty
Cats are creatures of habit and comfort. When a daily routine becomes a struggle, it can cause stress and anxiety. If a Munchkin consistently finds it hard to get into their litter box, they might start to associate the box with difficulty or even pain. This psychological barrier can lead to them seeking out alternative, more accessible spots around your home – places like bath mats, laundry piles, or corners of carpets. This isn't them being "naughty"; it's a clear signal that their needs aren't being met.
It's a subtle but important point that difficulty performing a natural function can impact a cat's overall well-being. A happy cat is one whose environment supports their instincts and physical capabilities, and ensuring easy litter box access is a fundamental part of that. Understanding Why a Munchkin Will Go Outside a Box It Cannot Enter is key to resolving these frustrating behaviors.
Health Implications of Inaccessible Boxes
Beyond the immediate inconvenience, an inaccessible litter box can have long-term health consequences for your Munchkin. When a cat avoids the litter box, they might hold their urine or feces for longer periods than is healthy. This can increase the risk of urinary tract infections (UTIs), bladder stones, or constipation. These conditions are not only painful but can also become serious if left untreated.
Furthermore, the awkward movements required to get into a high-sided box can put extra pressure on their developing or aging joints and spine. While Munchkins are generally active and playful, their unique leg structure means they carry their weight differently. Anything that adds unnecessary strain on their musculoskeletal system should be avoided. Ensuring a box that allows for natural, fluid movement is a proactive step in preserving their joint health throughout their life. It's also critical for hygiene, as a low-entry box can reduce the likelihood of them dragging their belly through soiled litter, which can then lead to skin irritation or matting on their underside. Which Litter Sticks to a Munchkin's Belly is a common concern when the box is too high.
Choosing the Right Box for Modification
Before you grab your tools, you need to select the right litter box for this DIY project. Not all plastics are created equal, and some designs lend themselves better to modification than others. The goal is to create a safe, stable, and easily accessible entrance for your Munchkin.
What Type of Plastic Works Best
When it comes to cutting, the type of plastic really matters. You want a box made from HDPE (High-Density Polyethylene) or PP (Polypropylene). These plastics are common in household items and are generally flexible enough to cut without shattering but rigid enough to maintain their shape.
- Look for sturdy, slightly flexible plastic: Avoid brittle or very thin plastics, as these are prone to cracking or splintering when cut, which can create sharp edges that are dangerous for your cat. The thicker the plastic, the less likely it is to warp or become flimsy after a section is removed.
- Avoid textured or reinforced rims at the cutting point: Some litter boxes have a thick, rolled rim for structural integrity. While great for a standard box, this can make cutting incredibly difficult and leave an uneven, rough edge. Try to find a box where the sides are a relatively uniform thickness from top to bottom.
- Check the bottom: Make sure the base of the box is solid and doesn't have any major structural indentations where you plan to cut.
If you're buying a new box specifically for this project, you can often find basic, unadorned designs at pet stores or online retailers like Chewy or Amazon that are perfect for modification.
Ideal Dimensions Before You Start Cutting
The beauty of DIY is tailoring it exactly to your cat! While there's no universal "perfect" dimension, we can aim for a good target. For most Munchkins, an entry height of 2 to 3 inches from the floor is ideal. This allows them to simply walk in without a significant step or jump.
- Consider your Munchkin's size and age: A very young kitten or an elderly Munchkin with arthritis will benefit from an even lower entry, perhaps closer to 1.5-2 inches. A larger, more agile adult might be fine with 3 inches. Remember, the goal is easy access.
- Maintain sufficient height elsewhere: While you're lowering one side, make sure the other three sides remain high enough to contain litter scatter and prevent "overshoots." A back height of at least 6-8 inches is usually sufficient for most cats to prevent messes, especially if your Munchkin tends to spray a bit or dig enthusiastically. This is Why a High Sided Box Still Suits a Munchkin in some areas.
- Entrance width: You'll typically be cutting a "U" shape or a ramp-like dip. Make sure the width of this lowered entrance is generous enough for your cat to walk through comfortably without feeling squeezed, usually about 6-8 inches wide.
Tools and Safety Gear You'll Need
Safety first, for both you and your cat! Gather all your tools before you begin.
- Measuring Tape or Ruler: For accurate marking.
- Marker Pen: A permanent marker works best for drawing clear lines on plastic.
- Cutting Tool: This is the most crucial part.
- Oscillating Multi-Tool (with a plastic cutting blade): This is often the easiest and cleanest option for thicker plastics, providing good control.
- Jigsaw (with a fine-toothed blade for plastic): Good for more intricate cuts, but requires a steady hand.
- Utility Knife / Box Cutter: Suitable for thinner plastics, but requires multiple passes and can be harder to keep straight. Make sure the blade is very sharp.
- Heavy-Duty Scissors or Shears: Only for very thin, flexible plastic.
- Sandpaper or Sanding Block (medium to fine grit): Essential for smoothing rough edges. A Dremel tool with a sanding attachment can also work wonders.
- Work Gloves: To protect your hands from cuts and scrapes.
- Safety Glasses: Plastic shards can fly during cutting.
- Respirator or Mask: If you're cutting plastic, especially with power tools, you'll want to avoid inhaling plastic dust.
- Clamps: To secure the litter box to a workbench or stable surface, preventing it from shifting during cutting.
Step-by-Step Guide to Modifying Your Litter Box
Now that you have your chosen box and tools, let's get down to the actual modification. Take your time, measure twice, cut once, and prioritize safety throughout the process.
Measuring and Marking Your Cut Line
This is where precision pays off. A well-marked line makes for a much cleaner cut and a safer entrance for your cat.
- Identify the Entry Side: Decide which side of the litter box will be the entrance. This is usually one of the longer sides, or a shorter side if you have limited space for orientation.
- Determine Desired Entry Height: As discussed, aim for 2-3 inches from the base of the box. Use your ruler to measure this height from the inside bottom of the box, not the outside (as the bottom thickness can vary).
- Mark Your Cut Points:
- On the chosen entry side, make a mark at your desired entry height on both the left and right edges.
- Then, measure in from each corner along the top rim by about 3-4 inches (or wider if your cat is larger) and make a mark. This defines the width of your entrance.
- Draw the Cut Line:
- Using your ruler, draw a straight line connecting the two lower height marks. This will be the bottom of your "U" shape or ramp.
- From each end of this bottom line, draw a vertical line upwards to meet the marks you made on the top rim.
- Finally, connect the top vertical marks with a curved or angled line across the existing rim, forming your desired entry shape. A gentle curve is often aesthetically pleasing and less prone to sharp corners than a sharp "U" shape.
- Double-check all your measurements and lines. This is your last chance to adjust before cutting!
Making the Initial Cut
This is the moment of truth. Work slowly and carefully, especially if you're new to using power tools.
- Secure the Box: Clamp the litter box firmly to a stable workbench or surface. Make sure the area you are cutting is well-supported and won't flex or move.
- Don Your Safety Gear: Put on your safety glasses, work gloves, and respirator.
- Start Cutting:
- With a Multi-Tool or Jigsaw: Begin by carefully plunging the blade into a corner of your marked line. Follow your drawn line slowly and steadily. Don't force the tool; let the blade do the work. Move around the perimeter of your marked entrance until the piece is fully detached.
- With a Utility Knife: For thinner plastics, score the line deeply with multiple passes. Apply firm, even pressure. Once scored, you might be able to snap the plastic cleanly along the score line. For thicker plastics, this can be extremely difficult and isn't recommended as it can lead to jagged breaks.
- With Shears: If the plastic is thin enough, you can simply cut along the lines, but this might leave a less precise edge.
- Remove the Piece: Once the cut is complete, carefully remove the cut-out section.
Smoothing and Reinforcing the Edges
A raw cut plastic edge can be surprisingly sharp and potentially harmful to your cat. Smoothing is a critical step you absolutely cannot skip.
- Rough Sanding: Use a medium-grit sandpaper or a sanding block to initially smooth down any major burrs or sharp points along the newly cut edge. Work in one direction, then the other, to really get rid of the rough bits. If using a Dremel, start with a coarser sanding drum.
- Fine Sanding: Switch to a fine-grit sandpaper to create a smooth, rounded edge. You want the edge to feel soft and dull to the touch, like a factory-finished product, not something that could snag fur or scratch skin. Pay extra attention to corners and any areas where the cut might have been less clean.
- Inspect Thoroughly: Run your fingers along the entire cut edge, both inside and outside the box, to ensure there are no missed sharp spots. Remember, your cat's delicate paws and nose will be touching this area.
- Optional Reinforcement: For added durability, especially if the plastic feels a bit thin after cutting, you can reinforce the new edge.
- Duct Tape/Electrical Tape: A simple solution is to apply heavy-duty, waterproof tape (like Gorilla Tape) along the smoothed edge, folding it over to cover both sides. This creates a soft, protected rim.
- Plastic Trim: You can purchase flexible plastic trim (sometimes used for car door edges or furniture protection) and secure it along the new rim. This provides a more finished look and excellent protection. Adhesive may be required.
- PVC Pipe Split: For very rigid protection, you could carefully split a piece of small-diameter PVC pipe lengthwise and fit it over the edge, securing it with a strong adhesive. This is more involved but creates a very robust edge.
Testing and Placement Considerations
Your modified litter box is almost ready! A little testing and thoughtful placement will ensure it's a success.
- Trial Run with Your Munchkin: Before putting litter in, encourage your cat to walk in and out of the new opening. Offer a treat or a favorite toy to entice them. Watch their movements – do they seem comfortable? Do they walk in easily? This helps them get used to the change and you can observe if the height is truly right.
- Fill with Litter: Use your preferred litter. Remember, even with a lower entry, the other sides should be high enough to contain scatter. You might find you need How Deep a Munchkin's Litter Should Be to be a little shallower near the entrance to prevent it spilling out easily, while still allowing for deep digging elsewhere in the box.
- Strategic Placement: Place the modified box in an area that is easily accessible and quiet. Avoid high-traffic areas or places where they might be startled. Consider putting it in a spot where they don't have to navigate stairs immediately after exiting, especially if they are older.
- Introduce Gradually: If your cat is resistant to change, place the new modified box right next to their old, unmodified one for a few days. Once they start using the new one consistently, you can remove the old one. Some cats are more sensitive than others to changes in their environment. How Far a Munchkin Should Have to Walk to a Box is also an important consideration.
- Monitor for Accidents: Keep a close eye on your Munchkin for the first few days and weeks. Any accidents outside the box are a sign that something still isn't quite right, and you may need to adjust the entry height further or consider other factors.
Alternatives to DIY and Further Enhancements
While cutting down a litter box is a fantastic way to customize for your Munchkin, there are other options available, and ways to enhance even your DIY solution for ultimate comfort.
Pre-Made Low Entry Options
If the idea of DIY with power tools fills you with dread, or if you simply don't have the time, you're in luck! The pet market has responded to the need for accessible litter boxes.
- Senior Cat or Special Needs Boxes: Many brands now offer litter boxes specifically designed for senior cats, kittens, or cats with mobility issues. These usually feature a much lower entry point, often a gentle dip, compared to standard boxes. Searching for "senior cat litter box" or "low entry litter box" on sites like Chewy or Amazon will yield many results. Why a Senior Cat Box Suits a Munchkin perfectly is because these boxes prioritize ease of access.
- Walk-Through Designs: Some innovative designs feature a small ramp or a very wide, shallow opening that almost allows the cat to walk straight in without stepping over anything. These can be excellent for cats with very limited mobility.
- Disposable or Recyclable Options: There are also cardboard or recyclable plastic litter boxes that come with low entries. These are often great for travel or temporary solutions, but might not be as durable for long-term use.
While these pre-made options often cost a bit more than a basic, unmodified litter box, they save you the time and effort of cutting and finishing.
Ramps and Steps as Add-ons
Sometimes, even a low-entry box might not be enough, or you might have furniture your Munchkin wants to access. Ramps and steps are fantastic tools to bridge the gap.
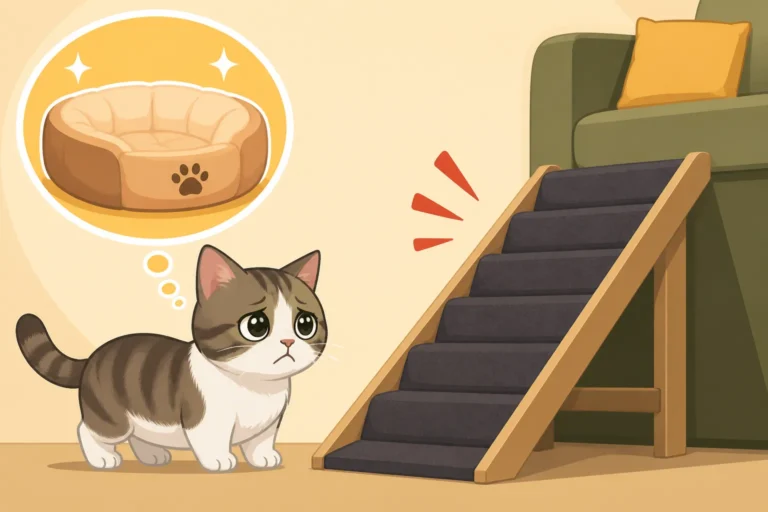
- Litter Box Ramps: You can find small ramps specifically designed to sit flush against a litter box, creating a gradual incline rather than a step. This is especially helpful for very elderly Munchkins or those recovering from injury, who might struggle even with a 2-inch step.
- Pet Steps: For accessing higher surfaces like a sofa or a favorite sunny windowsill, pet steps are invaluable. Just ensure the steps are not too tall for your Munchkin's short legs, and that they are wide and stable. How to Set Up Ramps Around a Munchkin's House can guide you on creating a fully accessible environment.
- DIY Steps or Ramps: If you're handy, you can construct your own wooden or sturdy cardboard steps or ramps. This allows for complete customization of height, width, and angle to perfectly suit your cat and your home decor. Just ensure they are carpeted or have a non-slip surface, as smooth ramps can be treacherous for little paws.
The key with ramps and steps is to ensure they are stable and don't wobble. A wobbly ramp can be scary for a cat and make them hesitant to use it.
Maintaining Hygiene with a Lowered Entrance
A modified litter box means a lower front, which can sometimes lead to more litter being tracked out or even accidental "overshoots" if your cat isn't careful. But there are easy solutions!
- Litter Mats: Invest in a good quality litter mat with deep grooves or a honeycomb design. Place it directly in front of the lowered entrance. These mats are designed to catch loose litter from paws as your cat exits, dramatically reducing tracking around the house. You can find excellent options on Chewy or Amazon.
- Consider Litter Type: Some litter types are naturally less prone to tracking. Fine-grain clumping litters tend to stick more to paws. Larger granule litters or crystal litters might track less. Experiment with different types to see what works best for your setup and your cat.
- Regular Cleaning: With a lower entry, you might find yourself doing more frequent spot cleaning around the box. This is a small trade-off for your cat's comfort. Scoop daily, and wipe down the area around the box every few days.
- High-Sided Options for the Back: Even with a low front, you can still choose a litter box that has higher sides and back. This helps contain litter if your Munchkin is a vigorous digger or tends to urinate high up in the box. The goal is to make the entrance accessible while still offering sufficient containment.
By proactively addressing potential hygiene issues, you can ensure your modified litter box remains a clean, comfortable, and stress-free solution for your beloved Munchkin.
Disclaimer
This article is for general informational purposes only and does not constitute professional advice. Laws, prices and regulations vary by location and change over time. Consult a qualified professional for guidance on your specific situation.