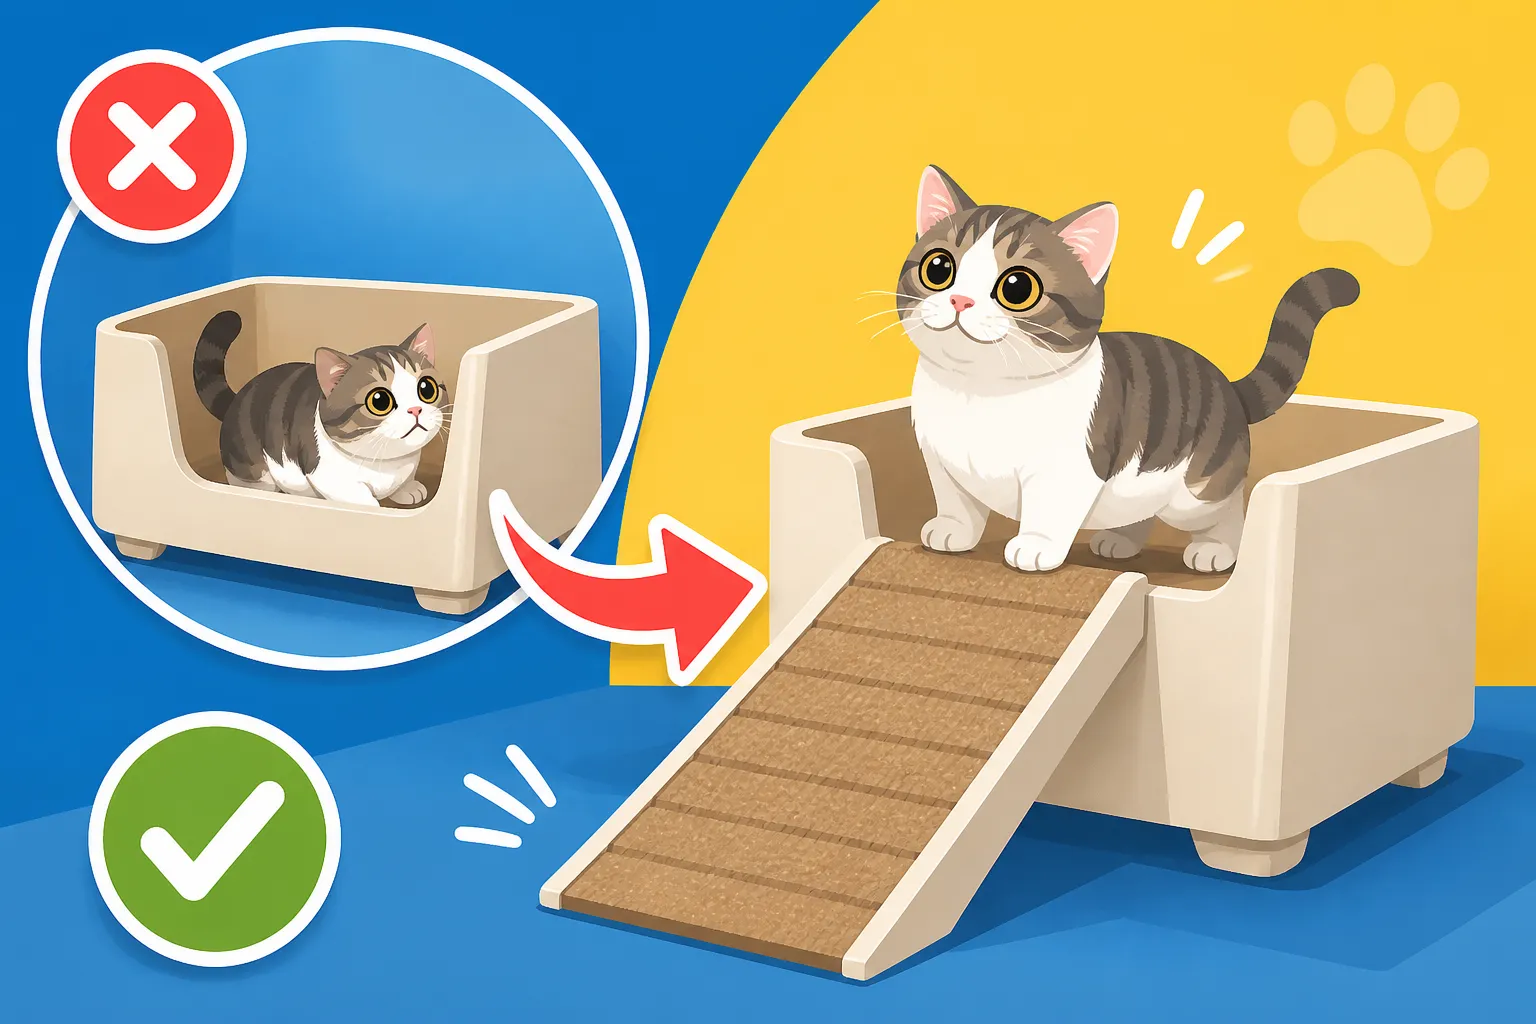
How to Add a Ramp to a Munchkin’s Existing Box
Many Munchkin cat owners face a common, quiet frustration: watching their little furry friends struggle with a standard litter box. That high lip, designed for long-legged cats, can become a daunting barrier, leading to accidents outside the box or, worse, your beloved kitty holding it in, causing potential health problems. This guide is all about giving your Munchkin a literal leg up, showing you how to seamlessly add a safe, accessible ramp to their existing litter box, ensuring their comfort and keeping your home clean.
The Frustration of Standard Litter Boxes for Munchkins
It’s a scene many of us have witnessed: your tiny Munchkin, with all the enthusiasm in the world, approaches their litter box. They stretch, they strain, they might even try a heroic leap, only to half-climb, half-fall into the box. Or worse, they decide it’s just too much effort and find a more accessible (and usually less desirable) spot to do their business. This isn't just an inconvenience for us; it’s a genuine struggle for them, born from their unique physical conformation. Their short legs, while undeniably adorable, weren't designed for scaling the mini-mountains that many litter boxes present.
Why High Sides Are a Barrier, Not a Benefit
For a typical cat, a high-sided litter box is often a benefit. It keeps litter from scattering across the floor when they dig vigorously, and it provides a sense of privacy and security. But for a Munchkin, those very same high sides become a daily obstacle course. Imagine trying to step over a fence that comes up to your waist every time you need to use the bathroom! That’s the reality for a Munchkin. They might brace their front paws on the rim, then try to hoist their body over, putting undue strain on their shoulders and spine.
This constant effort can lead to two main issues. Firstly, you might start noticing "accidents" just outside the box. Your Munchkin isn't being naughty; they're simply choosing the path of least resistance. They might even just miss the mark on the way in or out. Secondly, and more concerningly, they might start avoiding the litter box altogether, preferring to hold their bladder or bowels until they can't anymore. This reluctance is a clear sign that the box isn't working for them, and it’s a heartbreaking sight to witness your little one genuinely struggling with such a basic need. When a cat feels vulnerable or uncomfortable during elimination, they will seek alternatives, and it’s up to us to make their primary facility the easiest option.
The Hidden Health Risks of Difficult Access
The occasional missed jump might seem minor, but over time, the physical strain of navigating a tall litter box can contribute to significant health problems for your Munchkin. Every time they exert themselves to climb over a high edge, they are putting stress on their joints, especially their shoulders, elbows, and their unique spine. While Munchkins generally have a spine of normal length, the short legs mean that spinal column is carrying the same body mass closer to the ground, and any excessive strain can be problematic. Why a Munchkin's Spine Carries a Load a Normal Cat's Does Not This constant impact and awkward maneuvering can accelerate the onset of conditions like arthritis, particularly in their front limbs, which bear the brunt of the effort.
Beyond the physical strain, the psychological impact of a difficult litter box can also manifest as health issues. Cats are creatures of habit and cleanliness, and if they feel unable to relieve themselves comfortably or hygienically, it can cause significant stress. This stress, combined with the physical act of holding their urine, can contribute to urinary tract infections (UTIs) or, in the long run, even bladder stones. It's a cruel irony that a seemingly helpful feature of a standard litter box could inadvertently lead to such discomfort and potential illness for our short-legged companions. Providing an easy entrance isn't just about convenience; it's a vital part of preventative health care for your Munchkin.
Essential Considerations Before Building Your Ramp
Before you grab your tools and materials, it’s really important to take a moment to plan. Not all Munchkins are the same, and what works perfectly for one might not be ideal for another. Thinking through a few key factors will help you design a ramp that’s perfectly suited to your specific cat, ensuring their safety and comfort. It's about tailoring the solution to their needs, not just creating a generic ramp.
Assessing Your Munchkin's Specific Needs
Every Munchkin cat is an individual, and their ramp needs will vary based on several factors. A lively, young kitten will have different requirements than a senior cat who's starting to slow down. Getting this right will make all the difference in whether your cat embraces their new, accessible litter box.
Firstly, consider their age. A tiny Munchkin kitten, still growing and a bit clumsy, will need the gentlest slope imaginable – almost a flat walk into the box. Their coordination isn't fully developed, and steep angles could be intimidating or even dangerous. On the other hand, an older Munchkin might be dealing with stiffness or How Arthritis Shows in a Munchkin's Front Legs and will also benefit immensely from a very gradual incline. For senior cats, every bit of ease counts. What an Old Munchkin Stops Being Able to Do Their joints might ache, and the thought of even a small step can be enough to deter them.
Secondly, assess their current mobility and any existing health conditions. Does your Munchkin already show signs of stiffness in their legs or back? Do they favor one side? A vet check-up can sometimes reveal underlying joint issues you weren't aware of. If your cat has a known condition like mild lordosis or pectus excavatum, their posture and movement might be further compromised, making a perfectly level entry paramount. Even the specific length of your Munchkin's legs matters. Some are true "rug huggers" with extremely short legs, while others have legs that are merely abbreviated. The shorter the legs, the more gentle the incline needs to be. Observe how they currently move and what kind of ramps or steps they might already use (or struggle with) around the house. This personal observation is invaluable in customizing the perfect ramp.
Choosing the Right Materials for Safety and Durability
Once you understand your Munchkin's needs, it's time to think about the ramp itself. The materials you choose aren't just about aesthetics; they're crucial for safety, stability, and longevity. You want something that's sturdy, easy to clean, and provides excellent traction for those little paws.
Wood is a popular and durable choice. Plywood or pine planks can be easily cut and shaped, and they offer a robust structure. The main downsides are that wood can absorb odors if not properly sealed or painted, and it can be a bit heavier to move. However, with a good coat of pet-safe sealant or paint, wood ramps can last for years. PVC pipes and connectors can also create a lightweight, easily cleanable frame, especially for a prototype, but you'll still need a solid surface for the ramp itself. For a quick, temporary solution or a prototype to test angles, sturdy cardboard can work, but it's certainly not durable or hygienic for long-term use. Think of it as a mock-up to ensure your design is sound before committing to more permanent materials.
The absolute most critical aspect of material selection, though, is the non-slip surface. A slick ramp is worse than no ramp at all, as it can lead to falls and injuries. Carpet remnants, rubber matting, or even textured floor tiles are excellent choices. If using carpet, opt for low-pile industrial carpet or something designed for pet traffic, as it's easier to clean and less prone to snagging claws. Ensure whatever you choose is securely attached to the ramp surface—you don't want it shifting underfoot. Adhesive spray, screws, or heavy-duty staples can work, depending on the base material. When considering cleanability, look for materials that can be wiped down or even hosed off, as accidents will inevitably happen. Which Litter Suits a Munchkin's Low Belly You might also want to factor in where you'll source these materials. You can often find suitable non-slip mats or carpet tiles on platforms like Amazon, offering a variety of textures and colors to match your existing decor.
| Material | Pros | Cons | Best For |
|---|---|---|---|
| Wood | Sturdy, customizable, long-lasting | Can be heavy, requires sealing/painting | Permanent, robust ramps |
| PVC | Lightweight, waterproof, easy to clean | Can be less stable if not well-constructed | Lightweight frames, temporary solutions |
| Cardboard | Cheap, easy to cut, great for prototyping | Not durable, absorbs odors, not waterproof | Testing designs, very temporary use |
| Carpet | Excellent traction, comfortable | Can absorb odors/stains, requires regular cleaning | Non-slip surface for wood/PVC ramps |
| Rubber Mat | Excellent traction, waterproof, easy to clean | Can be more expensive, less aesthetically pleasing | Non-slip surface for high-traffic areas |
Step-by-Step Guide to Crafting Your Munchkin Litter Box Ramp
Alright, it's time to roll up your sleeves and get hands-on! Building a ramp for your Munchkin's litter box doesn't have to be complicated, but a systematic approach will ensure it's safe, stable, and perfectly suited to their needs. Don't worry if you're not a seasoned DIY expert; with a bit of patience, you can create a truly custom solution for your little one.
Measuring and Planning Your Ramp
The key to a successful ramp lies in careful measurement and a bit of foresight. A ramp that's too steep will still be a challenge for your Munchkin, defeating the whole purpose. So, let's get those measurements right!
First, measure the height of the litter box opening that your Munchkin uses. This is the vertical distance from the floor to the lowest point of entry. If your litter box has uniform sides, this is easy. If it has a scoop-out entry or a slightly lower front, measure to that specific point. Next, think about the desired length of your ramp. For Munchkins, a longer ramp is almost always better, as it creates a shallower, more comfortable incline. A general rule of thumb is to aim for a slope that's no steeper than 20-30 degrees. The lower that number, the better for their joints and comfort. For example, if your litter box is 6 inches high, a 12-inch long ramp would give you a 30-degree angle, while an 18-inch ramp would be a more gentle 19 degrees. Remember, How Steep a Munchkin's Ramp Can Be should always prioritize comfort over compactness.
Once you have your measurements, it’s a good idea to sketch out a simple plan. This doesn't need to be an architectural drawing, just a basic diagram showing the ramp's dimensions (length, width, height at the litter box end) and how it will connect. Consider the width of the ramp as well; it should be wide enough for your Munchkin to walk comfortably without feeling cramped, ideally at least as wide as their body. This planning stage helps you visualize the finished product and identify any potential issues before you start cutting materials. It's also where you can decide on the ideal connection method – will it simply rest against the box, or will you add a lip or bracket for more stability?
Cutting and Assembling the Structure
With your plan in hand, it’s time to bring your ramp to life. Safety first, always! Gather your tools, make sure your workspace is clear, and don’t forget protective eyewear if you’re doing any cutting.
For a wooden ramp, you'll typically need a piece of wood for the main ramp surface and potentially two triangular pieces for the sides to support the incline, or perhaps a simple rectangular base to lift the end that touches the floor. If you're using plywood, a jigsaw or circular saw will make quick work of cutting the main ramp piece to your determined length and width. Sand all edges thoroughly to ensure there are no splinters or sharp points that could injure your cat. A smooth finish is essential for safety and comfort.
Assembly can be done with wood glue and screws, or just screws if you prefer. Secure the ramp surface to any supporting sides or base pieces, ensuring everything is tight and stable. You want a ramp that feels absolutely solid underfoot for your cat. Wobbly or creaky ramps can be a major deterrent. If you’re building a modular ramp, perhaps from PVC, ensure all connections are firm. The goal is a structure that won't shift, flex, or make unsettling noises when your Munchkin uses it. Remember that your Munchkin will be relying on this ramp for daily access, so structural integrity is paramount. If you're wondering which type of litter box to adapt, remember that a low-entry senior cat box is often a fantastic starting point, as its lower front lip minimizes the height the ramp needs to overcome. Which Litter Box a Munchkin Can Actually Enter
Adding the Crucial Non-Slip Surface
This is arguably the most critical step for your Munchkin's safety and confidence. A bare wood or plastic ramp, especially if it gets even slightly damp, can be a slip-and-slide hazard for short legs. You need to provide reliable grip.
Choose your non-slip material carefully. Low-pile carpet remnants are excellent; they provide traction and a softer surface. Rubber matting, like what you might find for toolboxes or shelf liners, is also a great, easy-to-clean option. Even non-skid outdoor carpet tiles can be effective. You can often find affordable options for these materials online, perhaps on Amazon, which offers a wide selection of carpet tiles or non-slip rubber mats that can be cut to size.
Measure and cut your chosen material to fit the top surface of your ramp perfectly. You want it to cover the entire walking path without hanging over the edges, which could create a trip hazard. Once cut, secure it firmly to the ramp. For carpet, heavy-duty spray adhesive (ensuring it's fully dry and odorless before your cat uses it) or staples along the edges work well. For rubber mats, a strong, pet-safe adhesive is usually best. The key is to ensure it won't bunch up, slide, or peel away with repeated use. Imagine your Munchkin confidently trotting up the ramp, feeling secure with every tiny paw placement. This non-slip surface is what truly makes the ramp functional and safe. Which Surface a Munchkin's Ramp Should Have
Integrating the New Ramp and Encouraging Use
You've built a fantastic ramp, but the job isn't quite done! Now you need to introduce it to your Munchkin in a way that makes them feel safe and curious, not intimidated. Cats can be notoriously wary of new things, so patience and positive reinforcement are your best friends here.
Placement and Stability: Making It Inviting
The way you position and secure the ramp is crucial for its success. A wobbly ramp, or one that's awkwardly placed, will instantly deter your Munchkin, no matter how beautifully it's constructed.
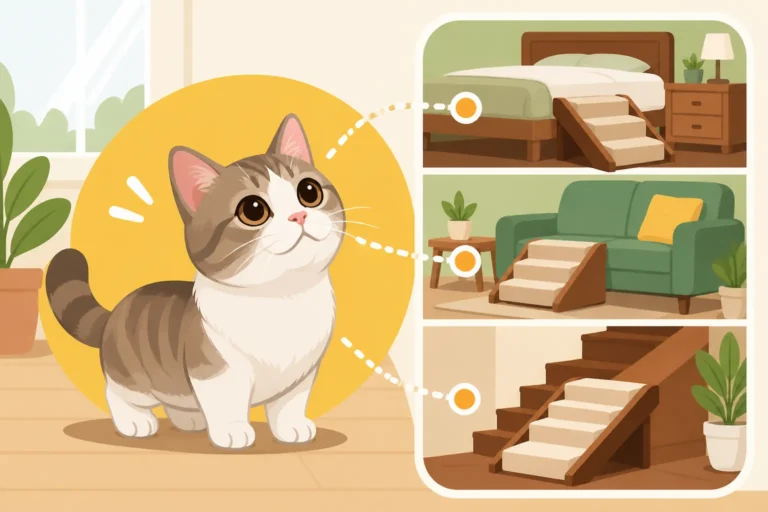
First, ensure the ramp is placed flush against the litter box opening. There should be no gap between the end of the ramp and the box that your Munchkin could step into or trip over. The transition needs to be seamless. If your litter box is pushed against a wall, ensure the ramp also aligns neatly, so there are no strange angles or obstacles around it. Next, and this is vital, make sure the ramp is absolutely stable. It shouldn't rock, slide, or creak when weight is applied. You might need to add non-slip pads to the bottom of the ramp's feet, especially if it's on a hard floor. In some cases, you might even consider adding a small bracket or velcro strips to gently secure the top of the ramp to the litter box itself, ensuring it doesn't shift during use. How to Anchor a Ramp So a Munchkin Trusts It This creates a strong, dependable connection that your cat will quickly learn to trust.
Finally, think about the approach to the ramp. Clear the area around it. Remove any toys, blankets, or other clutter that could block their path or make them hesitate. The ramp should be the obvious, easy route to their litter box. If you have other cats, make sure they don't block access to the ramp, especially if your Munchkin is timid. The idea is to make the entire setup feel open, safe, and undeniably easy to use, so your Munchkin never has to question how to get in or out.
Gentle Introduction and Positive Reinforcement
Cats often approach new objects with a healthy dose of suspicion. You can't just install the ramp and expect your Munchkin to immediately understand and embrace it. A gentle, positive introduction is key to success.
Start by simply placing the ramp in position next to their litter box, without forcing your cat to interact with it. Let them explore it at their own pace. They might sniff it, rub against it, or cautiously bat at it. Give them time to adjust to its presence in their environment. Once they seem comfortable with it just being there, you can start encouraging interaction. Lure them onto the ramp with their favorite treats. Place a few healthy cat treats at the bottom of the ramp, then a few more halfway up, and finally one just inside the litter box. Use a calm, reassuring voice. Don't pick them up and place them on the ramp, as this can be frightening and create a negative association. Whether a Munchkin Should Be Lifted Onto Furniture The goal is for them to choose to walk up it.
Every time they even just touch the ramp, offer praise and a small reward. Even a sniff in its direction can warrant a "Good kitty!" If they take a step, even better. The more positive experiences they have, the quicker they'll associate the ramp with good things. This might take a few sessions, or even a few days. Be patient and consistent. Some cats are naturally more adventurous, while others need more convincing. If they seem hesitant, try playing with a wand toy near the ramp, letting the toy "climb" the ramp, which might spark their curiosity and encourage them to follow. Remember, you're building trust and habit, not just a structure.
Troubleshooting Common Ramp Aversion
Even with the best intentions and the most careful construction, some Munchkins might still be wary of their new ramp. Don't despair! There are several things you can try if your cat seems to be ignoring or actively avoiding their beautifully built ramp.
First, reassess the ramp itself. Is the non-slip surface truly non-slip? Sometimes, what feels secure to us might feel slick to sensitive paws. You could try adding another layer of texture, like a thin carpet runner or even some textured grip tape designed for stairs. Also, consider the scent. New materials can sometimes have a strong odor that deters cats. Let the ramp air out for a few days, or gently wipe it down with a pet-safe, unscented cleaner from a brand like Chewy's selection, to neutralize any lingering smells.
If they're still jumping over the side of the litter box instead of using the ramp, you might need to temporarily block off their preferred entry point. This doesn't mean trapping them, but rather making the ramp the only easy way in. You could place a cardboard barrier or a small pet gate strategically to guide them towards the ramp. Just ensure it's not so high that they can't get over it if they really wanted to, but high enough to make the ramp the more convenient option. Finally, closely observe their behavior. Are they hesitant or genuinely afraid? Are they physically struggling? If you notice any signs of discomfort, like limping or vocalizing, it's worth a quick vet check to rule out any underlying pain that might be making ramp use difficult. Sometimes, a subtle change in their physical condition, especially as they age, can affect their willingness to navigate even the gentlest incline. What an Old Munchkin Needs Once Its Ramps Get Too Steep
Maintenance and Long-Term Care of Your Adapted Litter Box
Building the ramp is a fantastic step, but caring for it—and ensuring it remains a safe, inviting portal to your Munchkin's potty place—is an ongoing commitment. Just like any other piece of pet equipment, ramps require regular attention to stay hygienic and functional. This long-term care ensures your Munchkin continues to benefit from your thoughtful design for years to come.
Keeping the Ramp Clean and Hygienic
Litter boxes, by their very nature, are not the cleanest places. And because the ramp is essentially an extension of the litter box, it's going to get dirty too. Maintaining impeccable hygiene is paramount, not just for your home's cleanliness but also for your Munchkin's health and willingness to use the setup.
Establish a regular cleaning schedule for the ramp. Ideally, wipe down the non-slip surface daily when you scoop the litter box. This helps prevent the buildup of litter dust, tracking, and any stray "misses" that might land on the ramp. For more thorough cleaning, depending on the material of your ramp's surface, you might need to scrub it weekly. If you've used carpet, a small brush and a pet-safe enzymatic cleaner are excellent for breaking down odors and stains. Many fantastic options can be found through retailers like Chewy, which specializes in pet supplies. For rubber or sealed wood surfaces, a simple warm, soapy water solution followed by a thorough rinse and dry is usually sufficient.
It’s inevitable that sometimes, despite your best efforts, accidents will happen directly on the ramp. Perhaps your Munchkin gets startled, or an older cat simply can’t hold it for the full ascent. When this occurs, immediate and thorough cleaning is essential. Urine can quickly soak into porous materials and leave lingering odors that will deter your cat from using the ramp in the future. Disinfect the area completely, ensuring no scent remains, and allow it to dry fully before your cat uses it again. The goal is to keep the ramp as appealing and fresh as the clean litter inside the box itself.
Monitoring for Wear and Tear
Even the most robustly built ramp won't last forever without a little TLC. Constant use, cleaning, and the general environment around a litter box can take their toll. Regularly inspecting your Munchkin's ramp for signs of wear and tear is crucial for ensuring its continued safety and effectiveness.
Make it a habit to visually inspect the ramp every week or two. Look for any loose components: is the non-slip surface still securely attached, or are edges starting to peel? Are any screws or fasteners coming loose? Does the ramp wobble or creak when you gently press on it? Check for any splintering wood or sharp edges that might have developed, especially if your cat has been scratching at it. Any signs of instability or potential injury hazards mean it's time for a repair. Tighten screws, re-glue peeling surfaces, or sand down rough spots immediately.
As your Munchkin ages, their mobility might change, even if slowly. What was a perfectly comfortable slope at age two might become a challenge at age ten. You might notice your cat hesitating more, or taking longer to ascend the ramp. These are subtle cues that the ramp might need an adjustment or even a complete replacement with an even shallower incline. For example, you might need to How to Take Over an Old Munchkin's Grooming but also re-evaluate their entire environment. Don't wait until your Munchkin starts avoiding the ramp again; proactively address these signs of aging or wear. A well-maintained and adaptable ramp is a cornerstone of comfortable and healthy living for your short-legged friend throughout their entire lifespan.
Disclaimer
This article is for general informational purposes only and does not constitute professional advice. Laws, prices and regulations vary by location and change over time. Consult a qualified professional for guidance on your specific situation.