How to Anchor a Ramp So a Munchkin Trusts It
It's incredibly frustrating when you've invested in a ramp or set of steps to help your adorable short-legged Munchkin get around, only to find they eye it with suspicion or, worse, completely avoid it. Often, this isn't because your cat is being stubborn, but because the ramp itself feels a little wobbly, slippery, or just plain untrustworthy. This guide will walk you through exactly how to anchor a Munchkin ramp securely, ensuring it's a stable, reliable, and confidence-inspiring pathway for your feline friend.
Why a Wobbly Ramp Is a No-Go for Your Munchkin
Imagine trying to walk across a bridge that sways with every step, or trying to climb stairs that shift under your feet. It's unnerving, right? For a Munchkin, who already navigates the world from a lower vantage point and with a unique gait, an unstable ramp isn't just annoying – it can be genuinely frightening and even dangerous. Their short stature means they can't brace themselves or recover from a slip quite as easily as a long-legged cat, making trust in their environment paramount.
The Instinctive Fear of Instability
Cats are highly attuned to their surroundings, and their natural instincts tell them to avoid anything that feels insecure. If a ramp shifts, wobbles, or rocks even slightly when they put their weight on it, their survival instincts kick in. They'll perceive it as unsafe, and no matter how much you want them to use it, they'll likely choose to avoid it. This isn't them being difficult; it's them being smart and protecting themselves. A lack of confidence on a ramp means it will sit there unused, defeating the entire purpose of getting it in the first place. You're not just securing a ramp; you're building a foundation of trust.
The Hazard of Slippery Surfaces
Beyond instability, a slick surface is a major deterrent. Think about trying to walk on ice – it's doable, but requires extreme caution and can lead to falls. For a Munchkin, whose short legs mean their body is closer to the ground, they rely heavily on good traction and grip. Surfaces like bare polished wood, smooth plastic, or worn-out, flattened carpet on a ramp can be incredibly treacherous. A paw slipping can cause them to lose balance, leading to a nasty fall that could result in injury to their joints or spine. Once they've had a bad experience, even if you fix the slipperiness, they might remember the scare and be reluctant to try again. It's crucial to ensure their little paws have excellent purchase at all times, as detailed in Which Surface a Munchkin's Ramp Should Have.
Psychological Barriers and Reluctance to Learn
Cats are creatures of habit and memory, especially when it comes to comfort and safety. If your Munchkin has one unsettling or painful experience with a ramp – a wobble, a slip, or a fall – they're incredibly likely to develop a strong aversion to it. This creates a psychological barrier that can be much harder to overcome than simply fixing a physical problem. You can spend hours trying to coax them, but if that memory of instability or pain is there, they’ll resist. To truly encourage them to use ramps, you need to provide a consistently positive, safe, and stress-free learning environment from the very beginning. A well-anchored ramp removes a huge source of potential anxiety, making them much more receptive to using it.
Foolproof Methods to Anchor Your Munchkin's Ramps
Now that we understand why anchoring is so important, let's get into the nitty-gritty of how to do it effectively. The goal is to make the ramp feel like an immovable part of the furniture or floor, a seamless extension rather than a separate, potentially tricky object.
Securing the Base: Preventing Side-to-Side Movement
The base of your ramp is the first point of contact with the floor, and it needs to be rock-solid. Any sideways wiggle or sliding when your Munchkin steps on it will immediately erode their confidence.
- Non-Slip Mats and Pads: For ramps placed on hard flooring (wood, laminate, tile), a simple yet effective solution is to place a heavy-duty non-slip rug pad or rubberized mat underneath the ramp's base. Look for ones designed for furniture, not just rugs, as they offer better grip. You can find these at most home improvement stores or online retailers like Amazon.
- Rubber Furniture Grippers: These small, adhesive rubber pads can be applied directly to the bottom edges of the ramp's feet or frame. They create excellent friction, preventing sliding. Ensure the ramp's base is clean and dry before applying for maximum adhesion.
- Heavy-Duty Velcro Strips: If you want a semi-permanent solution that still allows you to move the ramp for cleaning, industrial-strength Velcro is your friend. Apply one strip to the underside of the ramp's base and the corresponding strip to the floor. This provides a strong, temporary bond. Make sure to use the heavy-duty kind, not the flimsy craft variety.
- Weighting the Base: Some lightweight ramps might benefit from added weight at the base. You can carefully attach sandbags (well-sealed to prevent leaks) or flat weights to the underside of the ramp's base using strong adhesive or zip ties, ensuring they don't interfere with the ramp's function or create trip hazards.
- Anti-Slip Spikes (for Carpet): If your ramp is on a carpeted floor and still slides, you can try anti-slip spikes or grippers designed for furniture on carpet. These subtly dig into the carpet fibers without damaging them, providing a surprising amount of stability.
Fixing the Top: Eliminating Slippage from Furniture
The point where the ramp meets the furniture (like a bed, sofa, or armchair) is equally critical. This is where many ramps tend to slip away from the furniture, creating a gap or an unstable angle that can be very off-putting.
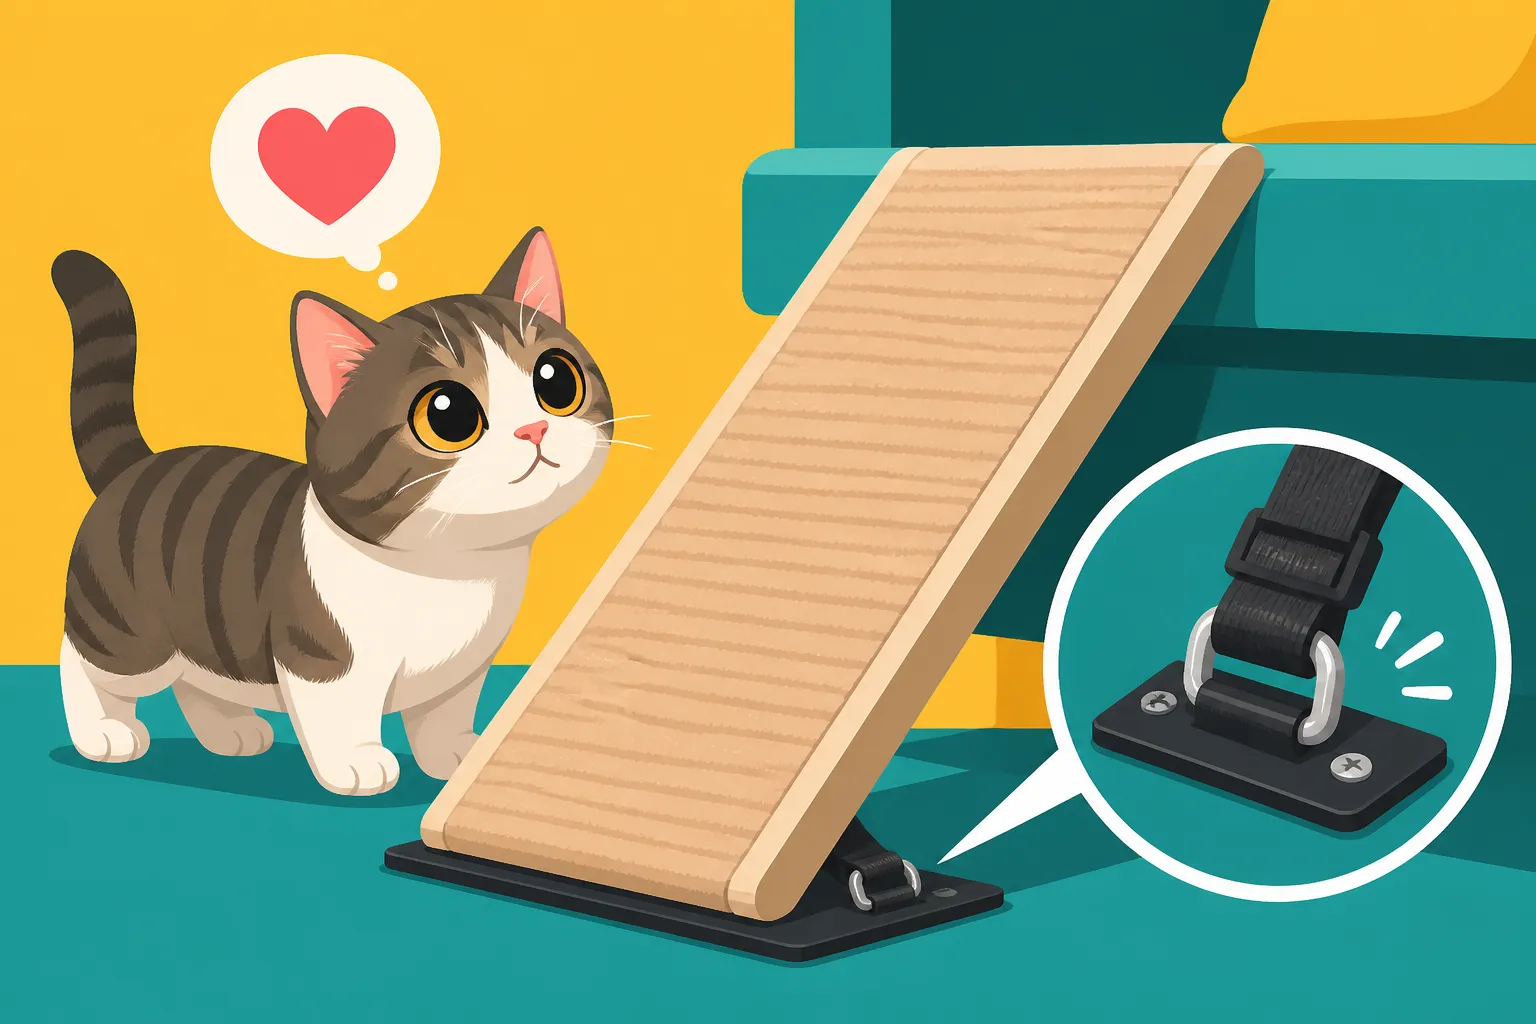
- Velcro Straps (Furniture to Ramp): Similar to securing the base, heavy-duty Velcro straps can be used here. Attach one part to the top edge of the ramp and the corresponding part to the edge of the furniture it's connecting to. This creates a strong, temporary bond that holds the ramp firmly in place. Many pet ramps sold on Chewy or Amazon come with these built-in or recommend them.
- L-Brackets or Corner Braces (Permanent): For a more permanent and robust solution, especially with wooden ramps, L-brackets or small corner braces can be screwed into both the ramp and the furniture. Always exercise caution here. If you're attaching to furniture, ensure you're not damaging structural components or voiding warranties. You might want to use felt pads or protective shims between the bracket and furniture to prevent scratches. This method ensures the ramp becomes almost an extension of the furniture.
- Non-Slip Rubber or Silicone Matting: Place a thin, non-slip rubber or silicone mat under the top lip of the ramp where it rests on the furniture. This provides excellent friction and prevents sliding, especially if the ramp simply rests over the edge of a bed or sofa.
- Ramp Design with Lip/Hook: When purchasing a ramp, look for designs that feature a built-in lip or hook at the top. These are specifically designed to catch onto the edge of furniture, providing inherent stability. While this isn't an anchoring method you apply, it's a design feature that greatly aids in creating a secure connection.
Reinforcing the Connection: Making It One Seamless Unit
The goal isn't just to stop the ramp from moving, but to make it feel entirely integrated with the furniture or floor. A seamless transition encourages use and minimizes hesitation.
- Ensure Proper Angle: The stability of a ramp is also heavily influenced by its angle. A ramp that is too steep will not only feel less secure but will also be harder for your Munchkin to navigate. Aim for a gentle incline. How Steep a Munchkin's Ramp Can Be is a crucial factor here. A shallower angle naturally distributes weight more evenly and reduces the leverage that can cause wobbling.
- Check for Flex: Press down on the ramp in various spots. Does it flex or bow under pressure? If it does, your Munchkin will feel this instability. Lightweight ramps, especially those made of thin plastic, can be prone to this. Consider reinforcing the underside with additional supports or choosing a sturdier ramp made of wood or higher-density plastic.
- Custom-Built Solutions: If you're handy, a custom-built ramp can offer the ultimate in security. You can design it to precisely fit your furniture, incorporating specific hooks, grooves, or attachment points that make it truly immovable. For example, a ramp that slides perfectly under a mattress or hooks over a bed frame's rail will feel incredibly stable.
- Padding the Landing Spots: Make sure the area at the top and bottom of the ramp is comfortable and secure. How to Pad a Munchkin's Landing Spot can prevent slips and make the overall experience more inviting. If the top landing is soft, like a mattress, ensure the ramp's connection point still feels firm.
Beyond Anchoring: Building Confidence in Your Munchkin
Even the most perfectly anchored ramp won't be used if your Munchkin doesn't want to use it. Anchoring is the critical first step, but building their confidence requires patience and positive reinforcement. Remember, A Munchkin Is a Normal Cat That Cannot Reach, so making their world accessible is key.
Gradual Introduction and Positive Reinforcement
You can't just install a ramp and expect your cat to understand its purpose overnight. Introduce it slowly and make it a positive experience.
- Start Small: Don't just place it by the bed immediately. Introduce the ramp in a low-stakes area first, perhaps leading to a favorite toy on the floor.
- Lure with Treats and Toys: Place high-value treats (like freeze-dried chicken or tuna flakes) on the ramp, leading a trail up to the top. Use their favorite wand toy to entice them to walk up and down. Every successful use, even a tiny step, should be met with praise and a reward. Many pet food brands available on Amazon or Chewy offer great options for healthy, motivating treats. How to Teach a Munchkin to Use a Ramp explains this in more detail.
- Never Force It: Forcing your Munchkin onto the ramp will only create negative associations and deepen their apprehension. Patience is paramount. Let them explore at their own pace. If they seem hesitant, step back and try again later.
- Consistent Rewards: Every time they use the ramp, even for a brief moment, offer verbal praise, gentle petting, or a small treat. This helps them associate the ramp with positive experiences. Whether a Munchkin Can Be Clicker Trained to Its Ramp offers a structured approach.
Optimal Placement and Accessibility
The location and design of your ramp also play a significant role in its perceived safety and usability.
- Lead to Desirable Destinations: Place ramps strategically to lead to places your Munchkin wants to go – a sunny windowsill, your bed, their favorite cat tree perch. If the destination isn't appealing, they'll have less motivation to use the ramp. Consider How to Set Up Ramps Around a Munchkin's House for broader ideas.
- Clear Paths: Ensure there's ample clear space at both the bottom and top of the ramp for your Munchkin to comfortably approach, transition onto, and exit from the ramp. Clutter can make them feel trapped or unsure.
- Lighting and Quiet: Avoid placing ramps in dark, shadowy corners or high-traffic, noisy areas where your cat might feel startled or vulnerable. A well-lit, quiet spot will feel much safer.
- Consider Other Pets/Children: If you have other pets or small children, ensure the ramp is a safe zone. A Munchkin cannot easily escape a playful dog or an overenthusiastic child, so they need unobstructed access and egress.
Regular Inspection and Maintenance
Anchoring isn't a "set it and forget it" task. Ramps, like any piece of equipment, can experience wear and tear over time. Regular checks are essential to maintain trust and safety.
- Daily Stability Checks: Give the ramp a quick wiggle test each day. Check all anchoring points (Velcro, brackets, non-slip pads) to ensure they are still firm and secure.
- Surface Inspection: Look for any signs of wear on the ramp's surface – frayed carpet, peeling grip strips, or smooth spots developing. Replace or repair these areas immediately to prevent slips.
- Cleanliness: Keep the ramp clean. Dirt, dust, and accumulated fur can reduce the effectiveness of non-slip surfaces. A quick vacuum or wipe-down can make a big difference. Why a Munchkin's Belly Fur Needs Checking is also relevant for overall cleanliness impacting their interaction with surfaces.
- Aging Cat Needs: As your Munchkin ages, their mobility might change. What felt like a comfortable incline yesterday might feel too steep or challenging tomorrow. Be prepared to reassess and adjust your ramp setup. Why an Old Munchkin's Ramps Need Regrading emphasizes this important aspect of long-term care. You might need to add more padding or even replace a ramp with a gentler slope or closer-set steps as they become less agile.
By taking the time to properly anchor and maintain your Munchkin's ramps, you're not just providing a piece of equipment; you're offering them freedom, safety, and the confidence to explore their world without unnecessary strain or fear.
| Anchoring Method | Best For | Pros | Cons |
|---|---|---|---|
| Non-Slip Mats/Pads | Hard floors (base) | Easy to implement, inexpensive | Can shift over time, less secure |
| Rubber Grippers | Ramp feet, furniture contact | Strong friction, subtle, durable | Requires clean surfaces for adhesion |
| Heavy-Duty Velcro | Floor-to-ramp, furniture-to-ramp | Very secure, semi-permanent, versatile | Can leave residue, may wear out |
| L-Brackets/Braces | Wooden ramps, permanent furniture | Extremely secure, very stable | Requires tools, potentially damages furniture |
| Weighting the Base | Lightweight ramps (base) | Adds mass, improves stability | Can be bulky, aesthetics affected |
| Built-in Lip/Hook | Pre-fabricated ramps (furniture) | Inherently stable, designed for purpose | Not adaptable to all furniture types |
Disclaimer
This article is for general informational purposes only and does not constitute professional advice. Laws, prices and regulations vary by location and change over time. Consult a qualified professional for guidance on your specific situation.